Connecticut Children’s Medical Center (IN BETA)- Wilderverse 2.0
Environment Creation, VFX, Lighting, Materials and Shaders, Blueprint Development, Optimization, Animation Blueprint Setup
Gameplay Tests
This project was so enjoyable because of the extreme amount of creative freedom I was giving when designing every aspect of the environments and particle effects. All I was given were some rough sketches of ideas and the old Wilderverse project and told to make it look better than the original. It was great to let loose creatively. I took a lot of inspiration from the art styles of games like Fable and Sea of Thieves. I wanted the worlds to feel magical and full of wonder, where any “scary” elements are tame enough for a toddler. My favorite level to work on was the cliff face. Its verticality allowed for so many interesting little props and mechanics!
Environments Created


Niagara Particle Effects
For this project, I had been asked to create “firefly shows”. These triggerable events needed to be complex enough to be interesting, but simple enough to be iterable for different particle types, colors, and assets. This was an interesting challenge, as I had never created something in Niagara with so much freedom yet such strict limitations at the same time.

This show uses the Niagara burst, Niagara fountain, and Niagara skeletal mesh
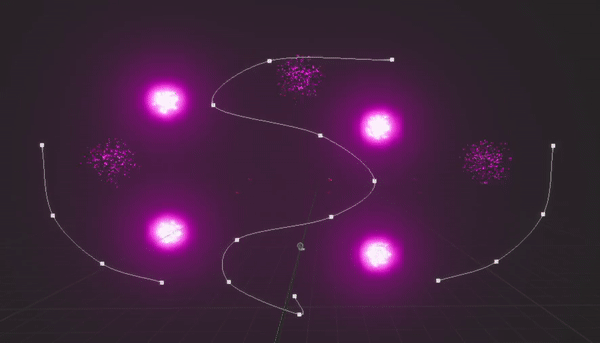
This show uses the Niagara spline, Niagara burst, Niagara firework, and outline shader
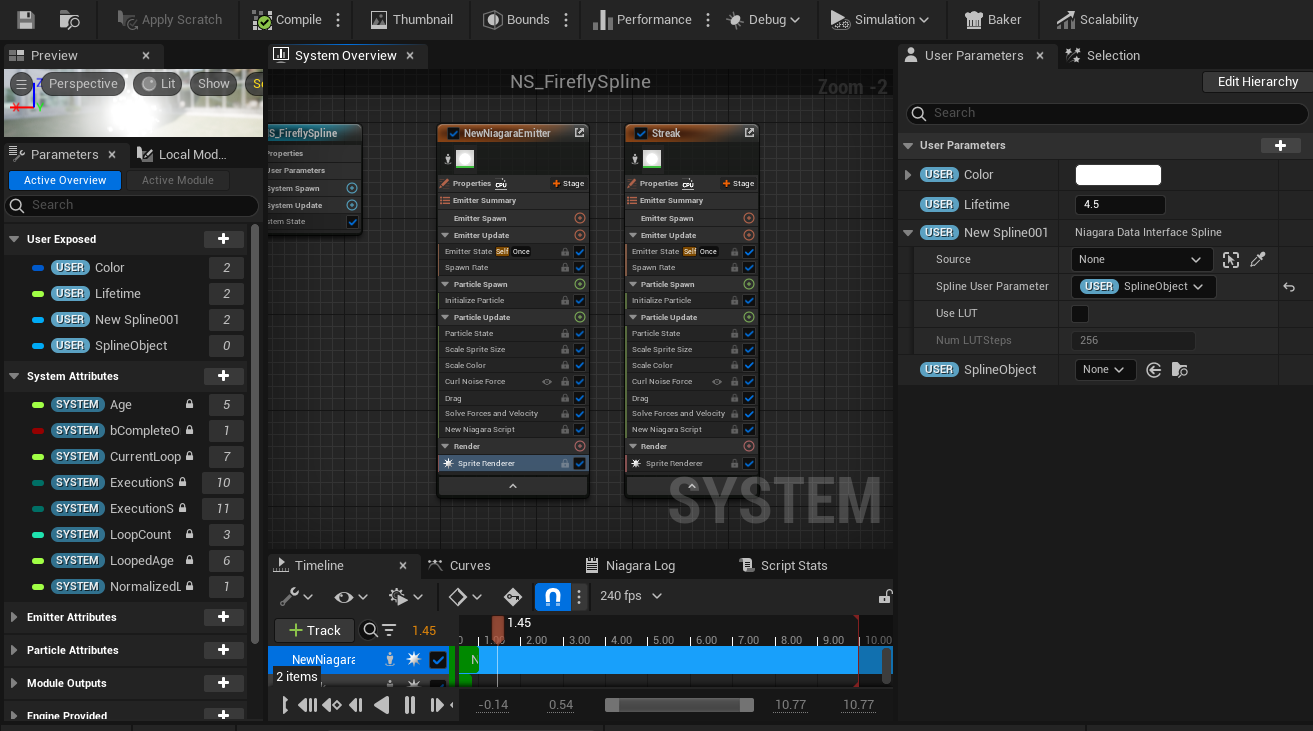
I decided to approach this challenge by building a bunch of Niagara System building blocks. Then these building blocks could be combined together in a blueprint to create more complex events. This would allow new easy creation of blueprint assets using this system. Then at runtime these blueprints could easily be spawned and played, and their parameters such as “Color”, “Secondary Color”, and “Lifetime” could be very easily changed as needed per spawn.
These Niagara building blocks included a burst effect, firework effect, fountain effect, spline effect, and skeletal mesh effect. Along with a shader that outlines its mesh and emits light at random intensities based on the intersection of two noise patterns.
I also made sure every aspect of these blueprints were well-documented and well-named. Since these blueprints will need to be understood by other people, I made sure the whole process was very easy to understand.

These blueprints all follow the same format. First, it starts in the construction script. Here, similar systems are grouped together and assigned an array variable. This is helpful later on when all members of a group need to do something like change color or trigger. Instead of having to trigger every particle effect individually, they are condensed into arrays for better understanding and more efficient graphing.


Screenshots of particle systems and shader
Next in the construction script, particle system parameters are set. Here, systems are being set to not auto-activate, so they don’t trigger as soon as the blueprint is spawned. Notice that those array variables I made earlier are being used here. Next, the colors are set. In all of the firefly shows, there are only two possible color variables: Main Color and Secondary Color. This is for easier understanding, and for consistency across Data Assets. Next, any lifetimes are being set. Notice how each category is carefully grouped together. This is for increased modularity. Any new nodes or string of nodes can be added and shifted around very easily.

After setting the lifetimes, any splines in the blueprint need to be attached to a particle system. This needs to be done manually in the blueprints, otherwise all the Niagara spline particle systems will automatically attach to the last spline added. Next, the same concept is applied to skeletal meshes with the Niagara skeletal mesh particle system. The mesh in the blueprint is set to “Hidden in Game,” but the system is still connected to it and uses it’s position and animation to create and update particles. The “Mesh” variable is actually an instance editable variable. This way, you can use the same particle system blueprint and just change out the mesh if you want a different character to be shown. Since there are 3 playable critters per game, this feature was very important to have. The last part of the construction script is to set an animation. Since you are changing the skeletal mesh asset, you need to be able to attach the appropriate animation asset to it, otherwise no animation will play. However, Unreal has issues being told to play an animation when the mesh playing it isn’t predefined before the construction script. Since I’m setting the mesh inside the construction script, this part breaks. I’m still trying to solve this. The blueprint is still useable without this, but in order to play animations you have to set the mesh in the blueprint viewport, making this asset less modular.

Now in the event graph, we trigger the actual shows. The way these graphs look vary greatly depending on which show is being triggered.
Left Firework Show (see above)

This event moves the skeletal mesh over a period of time along the X axis. Each firefly particle effect has a collision sphere at its root, and so when the skeletal mesh moves, it collides with these spheres and triggers the appropriate particle effects to go off. Notice that the first three particle triggers are using “Reset system” nodes instead of “Activate” nodes. This is because I prefer activate nodes, but by the time the first three particle systems are triggered, their first event is not yet over, thus they can not activate and must instead be reset.
Right Firework Show (see above)

This event is more complicated than the other, as more particle effects are triggered manually here. Each sequence number corresponds to an aspect of the firefly show to help with organization. So Then0 holds all the Burst particle effects, while Then3 holds all the character particle effects. Other than that, most of what is happening in this graph is just delays, activations, and color changes.